QU-16 Mixer Panel
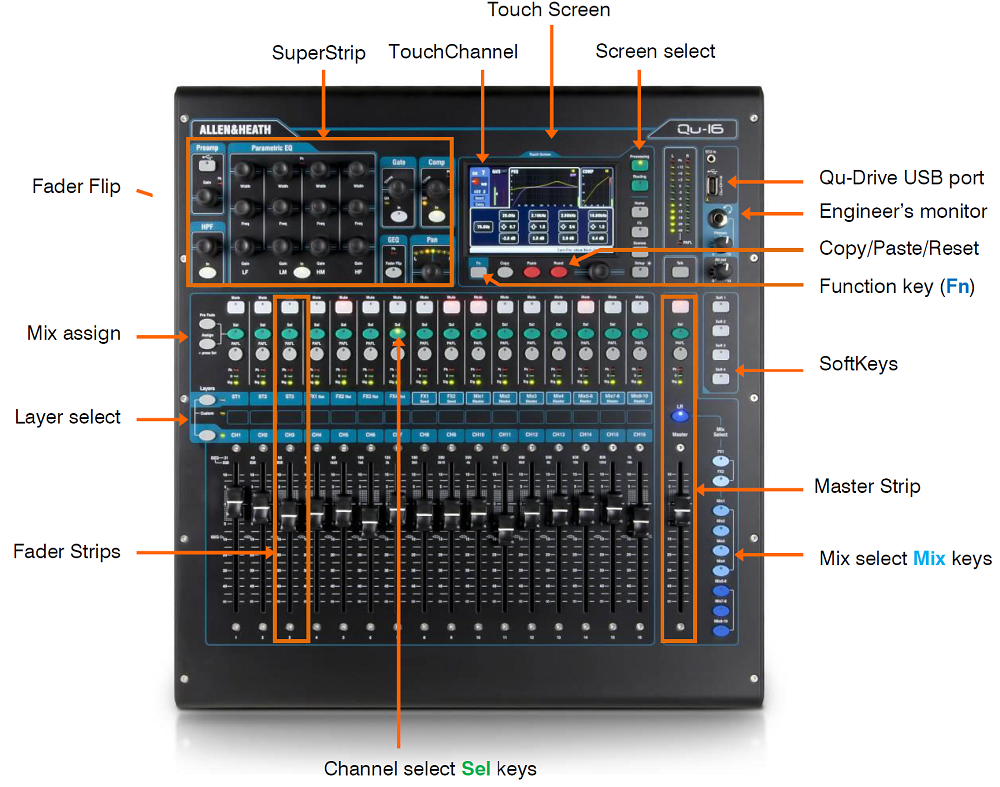

Church Sound System
How to power on the mixer?
Press the ON/OFF switch.
The mixer takes just a few seconds to boot up.
It restores its previous settings.
LR mix is selected and it’s processing shown on the screen.
Warning: To avoid loud thumps, do not switch the mixer on or off while the PA speakers are powered. Always switch the amplifiers on last, and switch them off first.
How to recall/restore a scene?
- Press
Scenesbutton - From the
Scenesscreen, press the scene you want to recall(AGCF2025) - Press
Recallbutton on the screen - Press
OKto restore the settings of the scene
How to switch the mixer off?
- First select the
Homescreen. - Touch
Shut Downto safely complete processes such as parameter storing and USB data transfer or recording. - Once complete, press the
ON/OFFswitch to turn the mixer off.

Stage Layout
- Piano#2, Vocal#7
- Vacal#10, 11, 12, 13(#4 if need one more)
- Monitor#1 to Drum
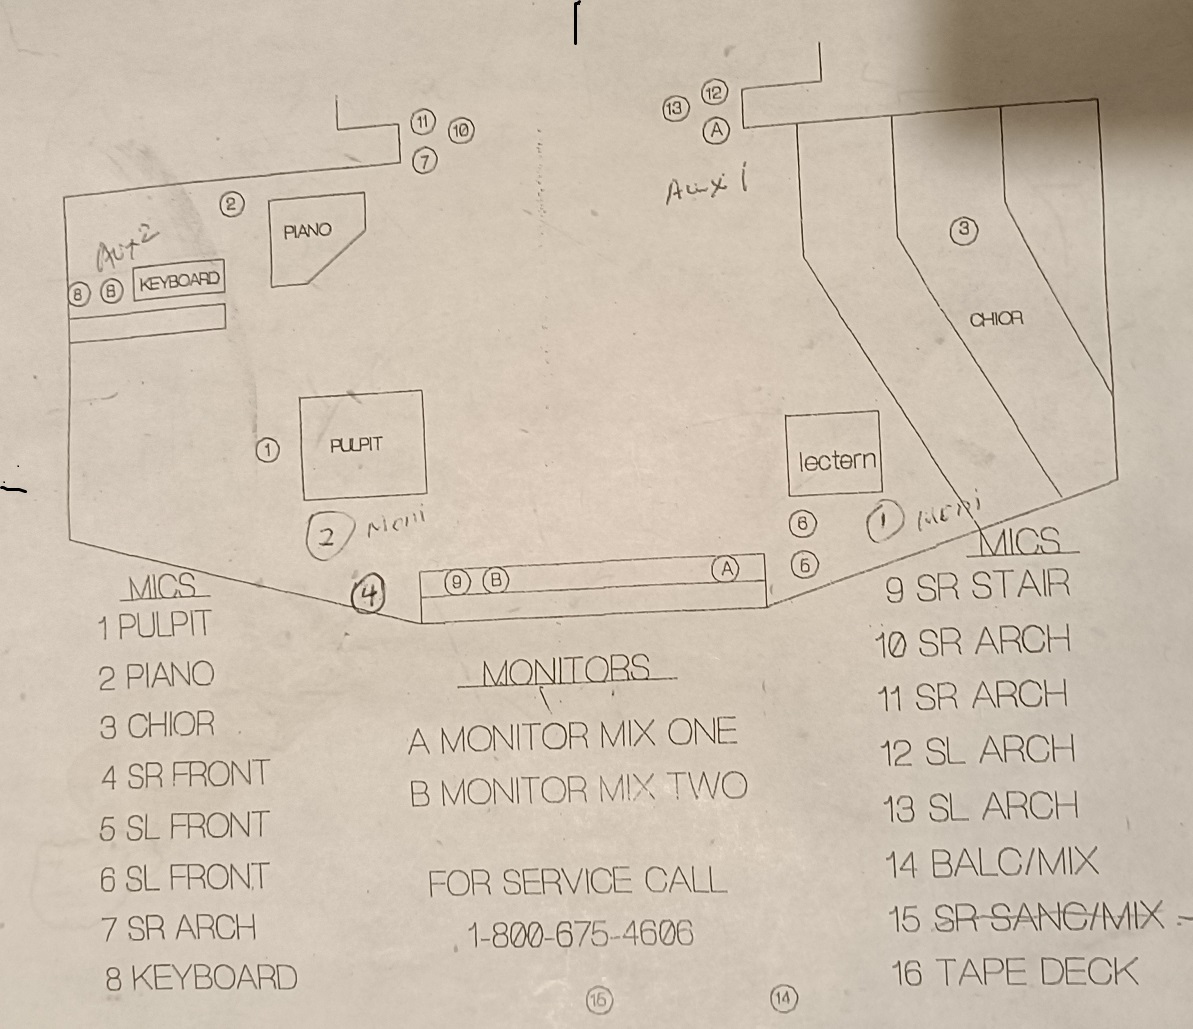
Other Ports
- Monitor#4 connect to video camera
- Port#15 for computer
- Port#14 and Port#16 are for wireless mics
XLR Port For Video Camera
Use Mixer#4 for video camera.
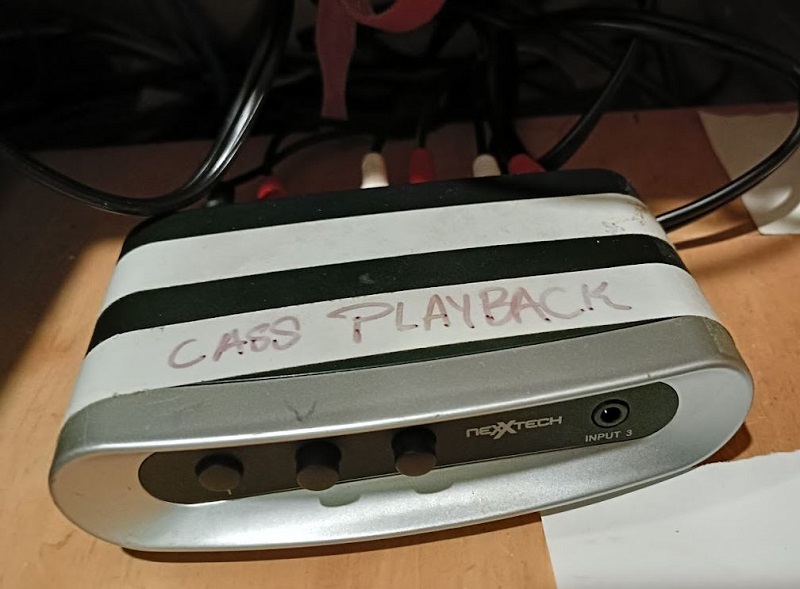
Which port / channel is for computer?
- Channel 15 is for computer audio.
- Make sure to press number#1 selector on
Nexxtech 3 Way Audio Selectorto switch to channel 15
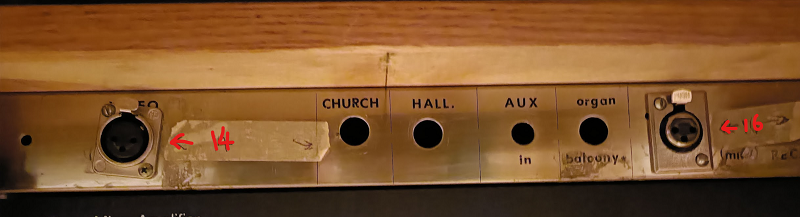
Wireless Mic Ports
Two wireless mics can connect to channel 14 and channel 16 ports under the mixer.
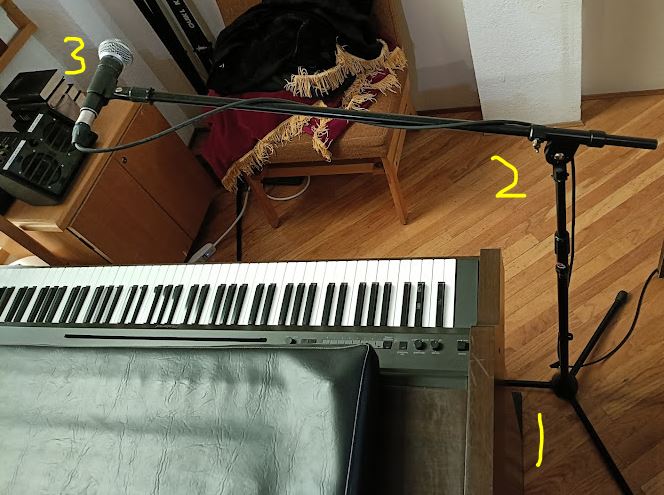
Piano and Singer
- Port#2 is for Piano.
- Port#? is for keyboard
Warning: Using tripod base for keyboard singer to prevent the stand from falling down.
Q & A
How to eliminate microphone background noise?
Turning on the Gate and increase the threshold to prevent the two wireless microphones from
capturing the nearby backgroud noise(someone talking).
How to copy channel 1 settings to channel 2 & channel 3?
- While holding down the
Copykey, press a Sel key of channel 1 to copy the associated processing parameters. - Then hold down the
Pastekey and press the strip Sel key of the channel 2, then Sel key of channel 3 to paste it to them. - Hold down Reset and press a key to reset parameters to factory default.
Note: You can also copy/paste Mix parameters using the above procedure.
How to save a session as a scene?
Once you have set up the mixer ready for the session,
- Press
Scenesbutton to go to the Scenes screen - Press one of the number in the scenes list
- Name it(AGCF2025) and press
OKto store the current mix settings as a scene.
You could name and store a scene as a template starting point for future shows, for each band after you sound check them, theatre show cues, recording sessions and so on.
You can store up to 100 scenes within the Qu mixer.
You can copy and clear existing scenes.
- To copy a scene hold down the Copy key and touch a scene in the list.
- Then hold down the Paste key and touch the scene position to copy to. This copies all scene parameters, its name and filter.
How to assign Pre/Post fade sends?
Hold down the Pre Fade key(at the left side of the channel 1 Sel key) and press Sel keys to toggle channel sends pre or post fader for
the mix currently selected in the Master Strip. The Sel keys light green to show channels set pre-fade.
How to set up Reverbs fx?
Set up three FXs:
- Press
FXbutton - Select
FX1(can be used by all vocal channel)- Tap
Fnbutton to open the preset library - FX Type:
Reverbs - Factory Library:
Plate Vocal - Tap
Recall
- Tap
- Select
FX2(can be used by instruments and vocals)- Tap
Fnbutton to open the preset library - FX Type:
Reverbs - Factory Library:
Hall Large - Tap
Recall
- Tap
- Select
FX3(can be used on drums)- Tap
Fnbutton to open the preset library - FX Type:
Reverbs - Factory Library:
Room Live Drums - Tap
Recall
- Tap
Assign channels to FX
- Press
FX1button, set all you vocals to -10db; - Press
FX2button, set all vocals to -20db, and all your guitars and keyboards to -10db, except for base guitar; - Press
FX3button, set all your drum mics to -10db, except for the kick drum;
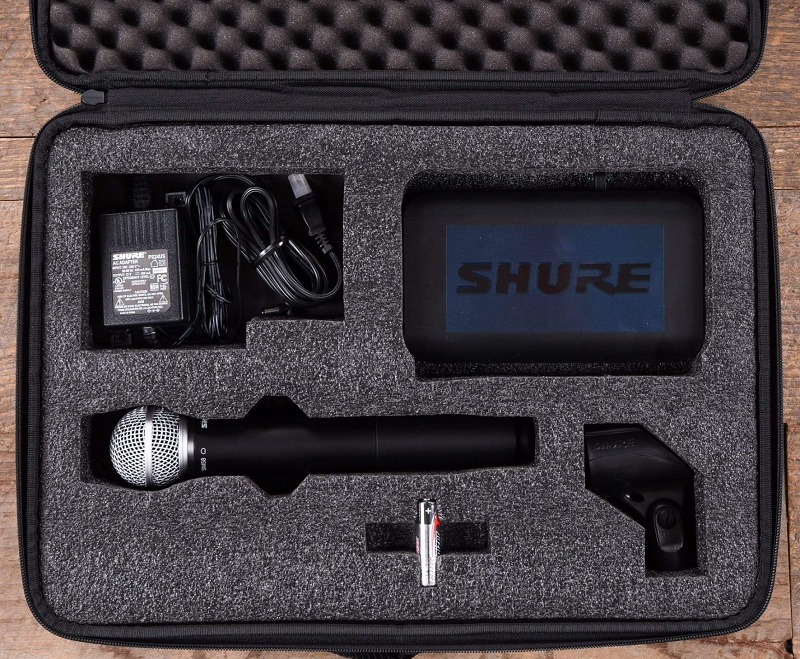
Shure BLX24
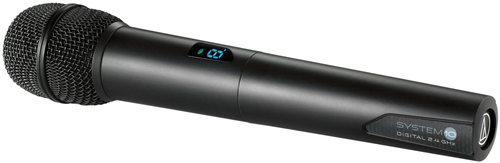
Audio Technica System 10
See here
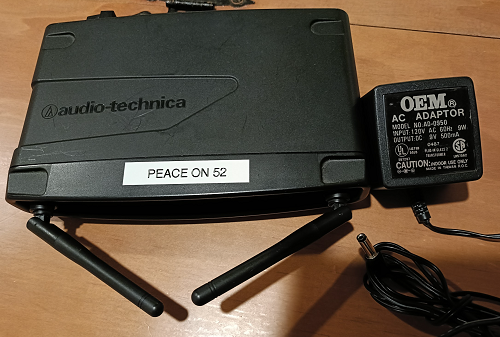
- System ID Select Switch: Press to cycle through System ID numbers.
- Pairing Switch: Press to initiate pairing.
- Pair Indicator: Glows green to indicate presence of paired transmitter. Also blinks green to indicate pairing mode activated.
Pairing Receivers with Transmitters
Note: Up to eight transmitters may be paired with any one receiver.
- Turn on the receiver and transmitter.
- Press the System ID button on the receiver you wish to pair.
The ID number will blink on the display. Continue to press the System ID button until the display shows the number from 1 to 8 that you want. - Within 15 seconds, press and hold the Pair button on the receiver for about one second.
The receiver’s Pairing Indicator will begin to blink green.
Your receiver is now in Pair Mode.
- Note: If the receiver’s Pair button is not pressed within 15 seconds, the System ID number will revert to its previous setting.
- Open your transmitter and press and hold its Pair button within 30 seconds of entering Pair Mode. The transmitter display will now show the System ID number you have chosen on the receiver. The receiver’s Pairing Indicator will glow steady, indicating you have successfully paired your system.
Troubleshooting
Wireless mic stop working due to battery too low
Two times in a row the wireless mic stop working due to low battery.
Possible solutions:
- Use more powerful batteries
- Turn the wireless mic on right before pastor use it
- Replace with another wireless mic
- Prepare a wired microphone standby and use it when needed