Netlify is a web developer platform that multiplies productivity.
Netlify provides continuous deployment services, global CDN, atomic deploys, instant cache invalidation, one-click SSL, a browser-based interface, and many other features for managing our Hugo website.
The STARTER plan is free for individuals. Following these steps to host the Hugo blog website on Netlify for free.
netlify.toml
I’ve created my blog website using Hugo(See Creating A Blog Using Hugo). To host the website on Netlify:
- Create a
netlify.tomlfile in the root of your project. - Add the following contents and commit to github.
| |
Login to Netlify
- Go to app.netlify.com and select your preferred signup method
- Selecting
GitHubwill bring up an authorization modal for authentication - Select
Authorize application
Create a new site from Git
- Select
Create new site from Git - Select
Github - Select the blog project and branch
- Click
Deploy Site - A generated site name(quizzical-yalow-451641) will show out if successfully deployed
- Visit the new deployed website from
https://quizzical-yalow-451641.netlify.app
Now every time you push changes to your hosted git repository, Netlify will rebuild and redeploy your site.
Customer domain name
By default, any site on Netlify is accessible via its Netlify subdomain,
which has the form [name-of-your-site].netlify.app.
Custom domains allow you to make your sites accessible at your own, non-Netlify domain names.
Configure - DNS Provider
- Go to your DNS provider website: eg. Canspace.ca
- Select
DNS Manager - Add a
CNAMErecord with subdomainblog, as the host - Point the record to your Netlify subdomain
quizzical-yalow-451641.netlify.app - Save the settings

Set up Netlify DNS for your domain
- Domain settings
- Add your customer domain:
blog.angang.ca - select
Yes, add domain
(Ignore this section for now)
- Add DNS records (optional) > Continue
The DNS records for your Netlify sites will be configured automatically.
- Update your domain’s nameservers (Required for automatic HTTPS)
Log in to your domain provider and change your nameservers to the following:
dns1.p07.nsone.net
dns2.p07.nsone.net
dns3.p07.nsone.net
dns4.p07.nsone.net

It may take hours for the settings to propagate across the global Domain Name System.
- Enable HTTPS
By default the Netlify subdomain is TLS enabled.
You can visit the website using
https://the-name.netlify.app. But if you use extenal domain name and the domain name is configured in your domain name provider DNS system.

After you added the Netlify nameservers to your domain name provider DNS system,
Netlify will provide TLS certificates with Let’s Encrypt automatically.
Visit the blog website and the protocol will changed to https.

Troubleshooting
Module “meme” is not compatible with this Hugo version
Netlify failed to build the blog site. Error message:
2:19:33 PM: Failed during stage 'building site': Build script returned non-zero exit code: 2
2:19:33 PM: build.command from netlify.toml
2:19:33 PM: ────────────────────────────────────────────────────────────────
2:19:33 PM: $ hugo --gc --minify
2:19:33 PM: WARN 2024/12/15 22:19:33 Module "meme" is not compatible with this Hugo version;
run "hugo mod graph" for more information.
I’ve updated the meme theme but the Netlify.toml still use the old Hugo version.
Update the Hugo version in Netlify.toml from the root of blog repository fixed the problem.
“build.command” failed
Error message
Command failed with exit code 255: hugo (https://ntl.fyi/exit-code-255)
This error is caused due to the repository is private.
Warning: Make sure your private repository can be deployed publicly.
To solve this problem
Go to Netlify
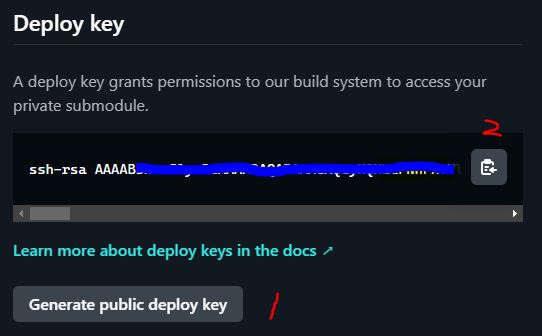
- In Netlify, go to the app, site settings > Build & deploy > Continuous Deployment > Deploy Key
- Click on
Generate deploy key - Copy the deploy key
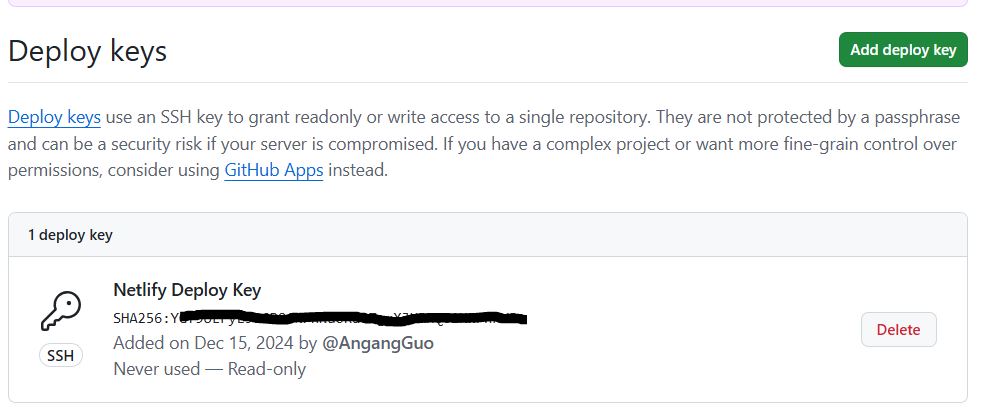
Go to GitHub repository you want to deploy
- Go to, settings > Deploy Keys
- Paste the deploy key and save
Hugo Themes not found
The git clone method for installing themes is not supported by Netlify.
A better approach is to install a theme as a proper git submodule.
~ $ cd blog
~/blog $ git init
~/blog $ git submodule add --depth 1 https://github.com/reuixiy/hugo-theme-meme.git themes/meme
DNS information missing
After adding the Netlify name server information into my Canspace DNS manager, it works well a short time.
The next day I can’t visit my website. the DNS records for angang.ca are missing!
Click the Add New Zone to re-add the domain name angang.ca into my DSN manager and map the the website
according to section Configure - DNS Provider

